Welcome on OXSEA SCHOOL !

On this page, you will find all the instructions for optimizing the use of your Oxsea mini diving tank.
Assembly videos, user manuals, after-sales service support…
Everything you need is right here !
If you need assistance, please don’t hesitate to contact our support team by phone at 04 13 33 34 38 or by email at: sav@oxsea.fr.
Download our user manuals in PDF format
Assemble your bottle :
1. Remove the black cap.
2. Screw the bottle's head onto the bottle's body.
3. Screw it in as far as it will go, applying a slight force towards the end. Be careful not to apply too much pressure to avoid damaging the bottle's thread.
ADJUSTING THE AIRFLOW RATE :
⚠️ Very slightly turn the small nut ⚠️
1. If no air is coming out of your bottle or not enough :
- In this case, turn the nut (using the Allen key) to the left to slightly raise the valve.
- Start with a quarter-half turn, close the bottle, and test.
- If the airflow rate is still not to your liking, repeat the process turning slightly further to the left.
- You can perform this adjustment even if your bottle is full.
2. If there's an air leak in your bottle, or air is escaping and you want to reduce the airflow rate to maximise your autonomy :
- In this situation, turn the nut (using the Allen key) to the right to slightly lower the valve.
- Begin with a quarter-half turn, close the bottle, and test.
- If the leak continues, repeat the adjustment turning slightly further to the right.
- This adjustment can also be performed when the bottle is full.
ASSEMBLY OF THE MEMBRANE :
When assembling the parts located under the head of your bottle, it's essential to follow the order below :
1. The black membrane should be positioned first, at the top.
2. Then, place the washer, ensuring the groove is facing upwards, in contact with the membrane.
3. After the membrane and washer are correctly positioned, insert the green seal.
Replacement of the explosion-proof disc
ASSEMBLING THE OX500PLUS BOTTLE
1. Grab the top of the bottle and screw it onto the cylinder.
2. Get rid of any protective gear, and give it a good old twist till it's snug as a bug.
3. Hook up the bit you'll be breathing from and make sure it's in a comfy spot.
4. If you're keen on using an external gauge, you'll need to get rid of the original one first.
5. You've got your external breathing thingo; make sure it's on nice and tight.
6. If You're Using the External Regulator :
7. Prepare the regulator and the hose. Tighten them securely. If necessary, use a wrench for additional tightening.
8. After removing the cap located above the air regulator, connect the hose inside.
9. To finish, insert your bottle into the back harness and secure the bottle head with the dedicated clasp.
ADJUSTING THE AIRFLOW
⚠️ You need to turn the small nut very gently ⚠️
1. No air is coming out of your bottle or not enough :
- In your case, turn the nut (using the Allen wrench) to the left to raise the valve slightly.
- Start with a half-turn, close the bottle, and test it.
- If the air flow still doesn't suit your needs, repeat the process by tightening slightly more to the left.
- You can perform this operation even if your bottle is filled.
2. There is an air leak on your bottle, air is escaping, and you want to reduce the air flow to maximize your autonomy :
- In your case, turn the nut (using the Allen wrench) to the right to lower the valve slightly.
- Start with a half-turn, close the bottle, and test it.
- If the leak is still there, repeat the process by tightening slightly more to the right.
- You can perform this operation even if your bottle is filled.
Turning clockwise allows for smoother breathing, while turning counterclockwise reduces the air flow.
Assemble your cylinder:
- Screw the head of the cylinder to its body.
- Screw it on as tightly as possible, forcing it slightly at the end. Be careful not to overtighten as this could damage the thread of the cylinder.
- Screw the regulator hose onto the cylinder.
- Screw the regulator to the other end of the hose.
Connect the OXAIR mask:
- Screw the appropriate regulator onto the OXAIR mask.
- Clip the mouthpiece onto the OXAIR mask.
Replacing the air regulator seal
- Replacing the air regulator seal
Replacing the air regulator seal
- Replacement
- Reassembly
Replacement of the explosion-proof disc
Assemble your manual pump:
- Take the base of your manual pump located beneath the white padding.
- Attach the base directly to the pump using the magnetic system.
- To remove the base, press the button located underneath.
Fill your bottle :
- Connect the high-pressure hose from your pump to your bottle.
- Make sure that the pressure relief valve at the back of the bottle is fully screwed in.
- Pump following this rhythm: 5 minutes of pumping/2 minutes of rest/5 minutes of pumping/2 minutes of rest, and so on. The rest times allow the pump to cool down.
- Once your bottle is full, unscrew the pressure relief valve so that the air in the hose can escape.
- Remove the high-pressure hose from your bottle.
Changing the filters :
- Open the blue cartridge at its end.
- Empty the activated charcoal into a container (only for the manual pump).
- Using a screwdriver or a knife, remove the cotton filter located at the bottom of the cartridge.
- Using the screwdriver, correctly place the new round cotton filter at the bottom of your filter cartridge.
- Put the activated charcoal back into the cartridge.
- Replace the filter in the head of the cartridge with a new one.
- Close the cartridge tightly to prevent air leaks.
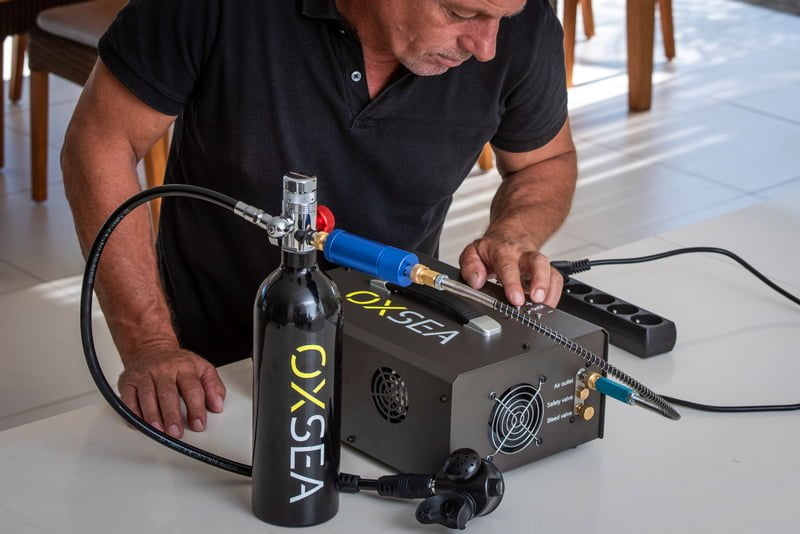
1. Connect your compressor using the 220V power cable or with the alligator clips if you are using a 12V battery.
2. Connect the high-pressure hose to your compressor. Then, connect the filter cartridge to your bottle.
3. Make sure to close the purge valve by screwing it in all the way.
4. Select the desired pressure (200 bars) and press the ON button.
5. Once your bottle is filled, the mini compressor stops automatically.
6. ⚠️ Unscrew to open the purge valve and let the pressure escape.⚠️
7. Remove the high-pressure hose from the bottle by pulling the end of the cartridge backward.
Refill station (Yoke | Din):
- Screw the refill station onto the standard scuba diving bottle.
- Close the pressure relief valve.
- Open the valve on the standard scuba diving bottle to transfer air into the Oxsea bottle.
- Close the valve on the standard scuba diving bottle once the Oxsea bottle is filled.
- Slowly unscrew the pressure relief valve to release the air from the hose.
- Unscrew the refill station and the Oxsea bottle.
2. Remove the mouthpiece from your snorkel.
3. Get your connector and screw it onto your regulator.
4. Insert the flexible part of the snorkel as far as it will go into the connector.
2. Get your external regulator.
3. Screw it in all the way. You can tighten it further with a wrench if needed.

